The Honeywell TH8320U1008 installation manual serves as a comprehensive guide for setting up the VisionPro 8000 Series touch-screen programmable thermostat. It provides detailed instructions for wiring‚ configuration‚ and advanced features. The manual ensures correct installation‚ leading to optimal performance and user satisfaction with the device.
Overview of the Honeywell TH8320U1008 Thermostat

The Honeywell TH8320U1008 VisionPro 8000 Series thermostat is a sophisticated touch-screen programmable device designed for precise temperature control and energy management in residential and commercial settings. This thermostat offers a user-friendly interface‚ allowing for easy programming and adjustments to suit individual comfort preferences.
Its universal compatibility supports a wide range of heating and cooling systems‚ including conventional setups and heat pump systems‚ providing flexibility for diverse installation scenarios. The TH8320U1008 features a clear‚ intuitive display that shows current temperature‚ setpoint‚ and system status‚ ensuring users are always informed about their indoor environment.
With its programmable capabilities‚ users can create customized schedules to optimize energy usage and reduce utility costs. The thermostat also includes advanced features such as adaptive intelligent recovery‚ which learns the heating and cooling characteristics of the building to ensure optimal temperature is reached at the programmed time. Its reliability and ease of use make it a popular choice for homeowners and contractors alike. Furthermore‚ the installation process is streamlined with detailed guidance provided in the accompanying manual‚ ensuring a smooth and efficient setup.
Initial Steps Before Installation
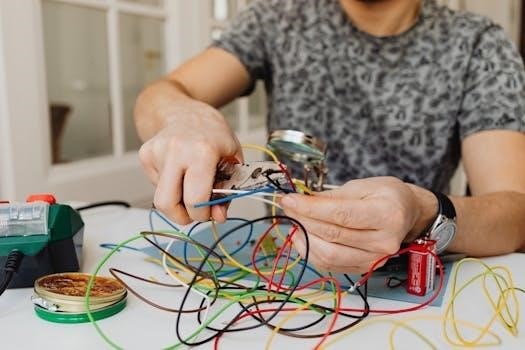
Before commencing the installation of the Honeywell TH8320U1008 VisionPro 8000 thermostat‚ several crucial steps must be taken to ensure a safe and successful setup. First and foremost‚ disconnect power to the existing heating and cooling system at the breaker or fuse box to prevent electrical shock during the wiring process.
Carefully remove the old thermostat from the wall‚ taking note of the existing wiring configuration. Label each wire with its corresponding terminal designation using the provided stickers or a marker‚ which will greatly simplify the wiring process for the new thermostat. Consult the existing thermostat’s manual or wiring diagram to understand the function of each wire.
Inspect the wires for any signs of damage or corrosion‚ and replace them if necessary to ensure reliable connections. Ensure that the installation location is suitable‚ ideally about 5 feet above the floor in an area with good air circulation and away from direct sunlight or drafts. Gather all necessary tools‚ including a screwdriver‚ wire stripper‚ level‚ and drill‚ to facilitate the installation process. Finally‚ thoroughly review the Honeywell TH8320U1008 installation manual to familiarize yourself with the wiring diagrams and setup procedures specific to your system type.
Wiring Instructions for Conventional Systems
When wiring the Honeywell TH8320U1008 thermostat to a conventional heating and cooling system‚ it is crucial to follow the wiring diagram provided in the installation manual precisely. A typical conventional system includes separate wires for heating‚ cooling‚ fan‚ and common connections.
Identify the corresponding terminals on the thermostat’s base plate‚ such as R‚ W‚ Y‚ G‚ and C. Connect the wires from the heating system to the appropriate terminals. The “R” terminal is typically for the 24V power supply‚ the “W” terminal for the heating call‚ the “Y” terminal for the cooling call‚ and the “G” terminal for the fan.
The “C” terminal‚ if present‚ is for the common wire‚ which provides a stable power source for the thermostat. Ensure that each wire is securely connected to its respective terminal‚ and double-check the wiring against the diagram to avoid any errors. For systems with a separate transformer for heating and cooling‚ a jumper wire may be required between the R and Rc terminals. If you are unsure about any aspect of the wiring‚ consult a qualified HVAC technician to prevent damage to your system or the thermostat.
Wiring Instructions for Heat Pump Systems
Wiring a Honeywell TH8320U1008 thermostat for a heat pump system requires careful attention to ensure correct functionality. Heat pump systems differ from conventional systems as they use a reversing valve to switch between heating and cooling modes. The installation manual provides a detailed wiring diagram specific to heat pump configurations.
Identify the terminals on the thermostat base plate‚ which may include R‚ Rc‚ O/B‚ Y‚ G‚ and C. The “R” and “Rc” terminals are for the 24V power supply‚ and a jumper wire may be needed if your system only has one transformer. The “Y” terminal controls the compressor‚ while the “G” terminal controls the fan.
The “O/B” terminal is crucial for heat pump systems‚ as it controls the reversing valve. Depending on your system‚ the reversing valve may be energized in heating (“O” setting) or cooling (“B” setting). Connect the wire from the reversing valve to the appropriate O/B terminal based on your system’s configuration. As with conventional systems‚ the “C” terminal is for the common wire‚ providing a stable power source. Double-check all connections and consult a professional if you are unsure about any aspect of the wiring to avoid damage to your system or the thermostat.
Mounting the Thermostat
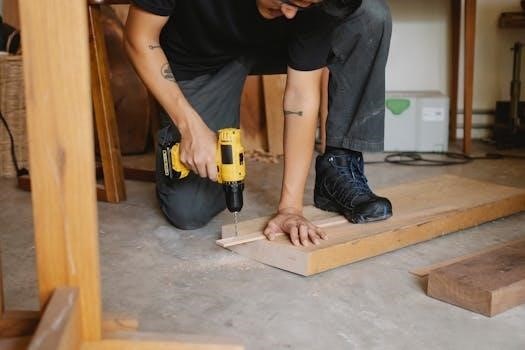
Properly mounting the Honeywell TH8320U1008 thermostat is crucial for accurate temperature sensing and optimal performance. Begin by selecting a suitable location on an interior wall‚ approximately 5 feet (1.5 meters) above the floor. The chosen spot should have good air circulation and be away from direct sunlight‚ drafts‚ and heat sources such as lamps or appliances.
Once you’ve selected the ideal location‚ use the provided wall plate as a template to mark the mounting holes. Ensure the wall is clean and dry before proceeding. Drill holes at the marked locations‚ using a 3/16-inch drill bit for drywall or a 7/32-inch drill bit for plaster. Insert wall anchors into the holes if necessary to provide a secure hold for the screws.
Next‚ align the wall plate with the drilled holes and attach it to the wall using the provided mounting screws. Ensure the wall plate is level before tightening the screws completely. With the wall plate securely mounted‚ carefully attach the thermostat to the wall plate‚ aligning the pins on the back of the thermostat with the corresponding slots on the wall plate. Gently press the thermostat onto the wall plate until it clicks into place‚ ensuring a secure connection.
Adjusting the Real-Time Clock
Setting the real-time clock on your Honeywell TH8320U1008 thermostat is essential for accurate scheduling and energy savings. After the thermostat is properly mounted and powered on‚ the display will prompt you to set the current date and time. To begin‚ press the “Menu” button on the thermostat’s touchscreen.
Navigate through the menu options until you find the “Set Clock” or “Date/Time” setting. Select this option to access the clock adjustment screen. Use the up and down arrow buttons to adjust the hour‚ minute‚ month‚ day‚ and year. Make sure to select the correct AM or PM setting for the hour.
Once you have entered the correct date and time‚ press the “Done” or “Save” button to save the settings. The thermostat will now display the accurate time and date. Verify that the time is displayed correctly to ensure that your programmed schedules will run as intended. Accurate timekeeping is crucial for the thermostat to effectively manage heating and cooling cycles‚ leading to energy efficiency and comfort.
Installer Setup Options and Configuration
The Honeywell TH8320U1008 thermostat provides a range of installer setup options to customize the thermostat’s operation to match the specific heating and cooling system. To access these settings‚ press and hold the two blank buttons on the thermostat until the display changes‚ revealing the installer setup menu. This menu allows for configuration of various parameters.
Within the installer setup‚ you can configure the system type‚ such as heat pump or conventional system‚ and the number of heating and cooling stages. It is also possible to set the temperature display to Fahrenheit or Celsius‚ adjust the temperature swing (cycle rate)‚ and enable or disable adaptive intelligent recovery‚ which allows the thermostat to learn how long it takes to reach the desired temperature;
Additionally‚ you can configure advanced settings like the heat pump reversing valve action and the auxiliary heat lockout temperature. Properly configuring these options ensures optimal performance and compatibility with your HVAC system. Always refer to the installation manual for detailed explanations of each setting and recommended values for your specific equipment. Incorrect settings can lead to inefficient operation or damage to your system.
System Checkout After Installation
After completing the installation and configuration of the Honeywell TH8320U1008 thermostat‚ performing a system checkout is crucial to ensure proper operation. This process involves testing each function of the thermostat and the connected heating and cooling system to verify that everything is working as expected.
Begin by testing the heating mode. Set the thermostat to heat and raise the setpoint temperature above the current room temperature. Verify that the heating system turns on and that warm air is being circulated. Next‚ test the cooling mode. Set the thermostat to cool and lower the setpoint temperature below the current room temperature. Ensure that the cooling system activates and that cool air is being delivered.
If you have a heat pump system‚ test the auxiliary heat function. Set the thermostat to emergency heat mode and confirm that the auxiliary heat source engages. Also‚ test the fan operation by setting the fan switch to both “auto” and “on” positions to ensure the fan runs as expected. Finally‚ check that the thermostat is accurately displaying the room temperature and that the programming features are functioning correctly.
Troubleshooting Common Issues

Encountering issues during or after the installation of the Honeywell TH8320U1008 thermostat is not uncommon‚ but most problems can be resolved with systematic troubleshooting. One frequent issue is the thermostat not powering on. Ensure the breaker is on and the wiring is correct. Check the batteries if it’s a battery-powered model.
Another common problem is the thermostat displaying an incorrect temperature. Verify that the thermostat is not exposed to direct sunlight or drafts. Recalibrate the temperature sensor in the installer setup menu if necessary. If the heating or cooling system fails to respond‚ double-check the wiring connections. Ensure the wires are securely connected to the correct terminals.
For heat pump systems‚ issues may arise with the reversing valve. Confirm that the thermostat is configured correctly for a heat pump system and that the reversing valve wire is connected properly. If programming issues occur‚ reset the thermostat to factory settings and reprogram it. Consult the installation manual for detailed troubleshooting steps and diagrams. If problems persist‚ contact a qualified HVAC technician for assistance.